Perhaps you are browsing the Internet to look for an easy and proper way to backup your iPhone data to Mac. Then, you are in the right place. In this guide, I am going to show you four easiest ways to backup your iPhone/iPad on your Mac, including music, videos, photos, apps, contacts, messages, and other things.
With the detailed instruction, you can choose the fastest way for you to backup your iOS device to your Mac.
Before getting started, you should remember that I don’t advertise for any third party apps that are designed for backing up iOS device to the computer. All of the following apps are recommended by authorities, such as Cnet, 9To5Mac, etc.
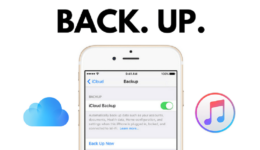
Method 1: Backup your iPhone via iTunes
The first one, also the traditional method that many of you might have already known is to backup your iPhone using iTunes. But, those who still do not know how to backup through iTunes, perform the following steps:
Step 1: Toggle off iCloud before backup.
Before proceeding with backing up your iPhone, you should ensure iCloud is already turned off on your iOS device first. You are not able to create backups through iTunes if iCloud is enabled. Head to Settings > iCloud > Storage & Backup and toggle the iCloud Backup switch off.
Step 2: Plug your iPhone into your Mac and open iTunes.
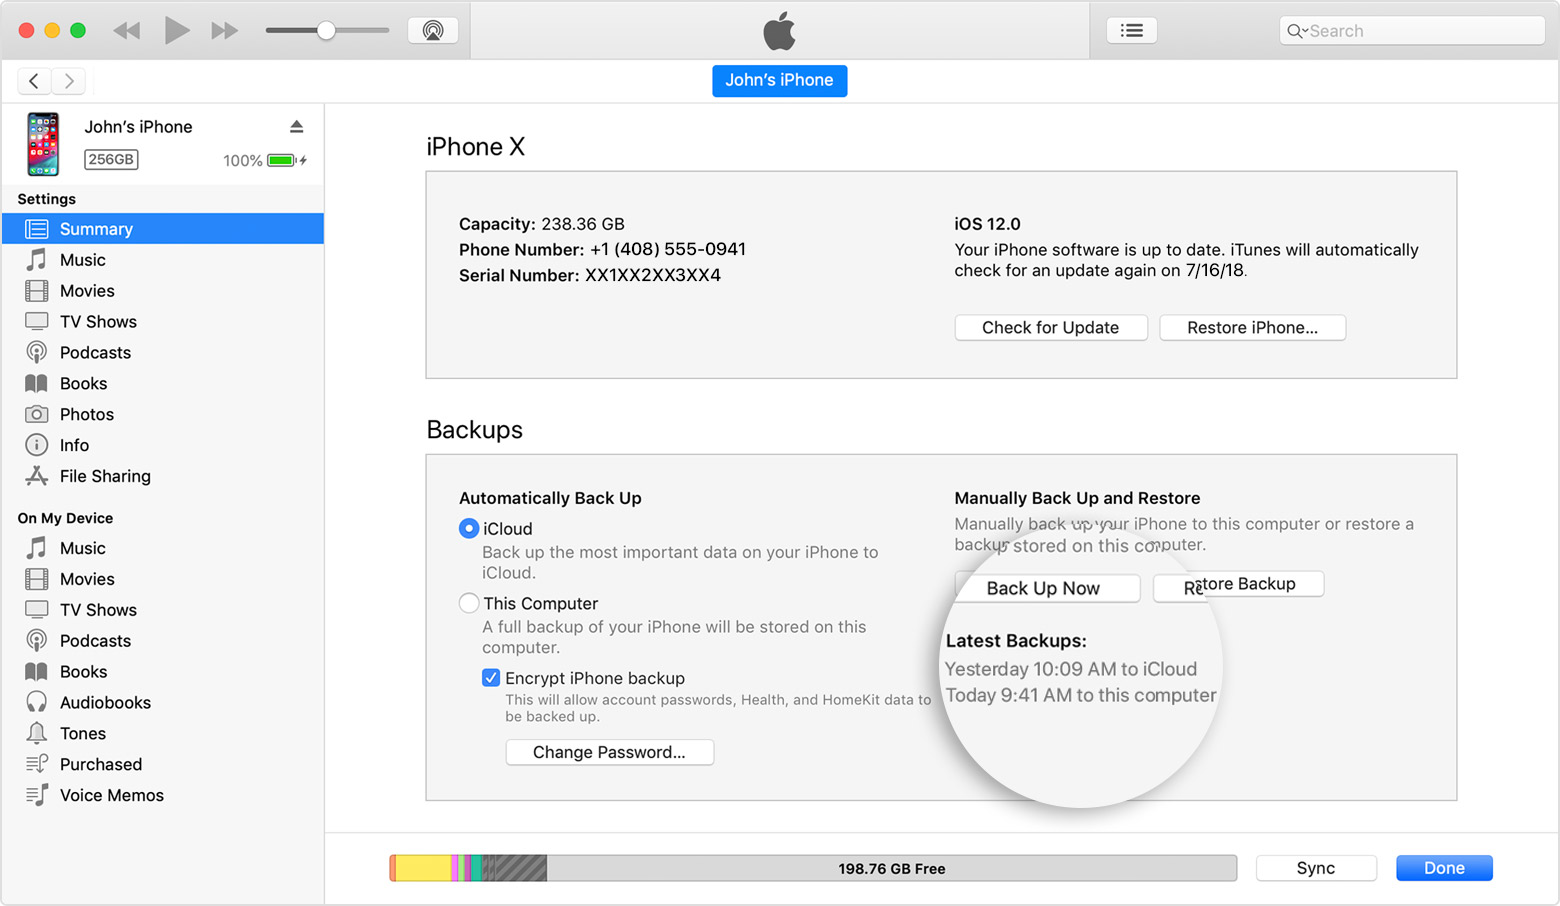
If you want to sync your iPhone with iTunes through Wi-Fi, navigate to Settings > General > iTunes Wi-Fi Sync and then choose your computer from the list available. There is an option “Sync Now” showing up the screen. By default, your iPhone will automatically sync when the device meets three conditions: 1) the screen is locked (i.e., you’re not using the device), 2) the device is connected to Wi-Fi, and 3) the device is plugged into a power source.
Step 3: Start to Backup.
Choose your device in the left panel, then click Back Up Now on the right.
Method 2: Use Universal Clipboard To Backup
This is an inbuilt feature. Universal Clipboard allows you to easily copy and paste texts, photos, links between your Mac and iPhone.
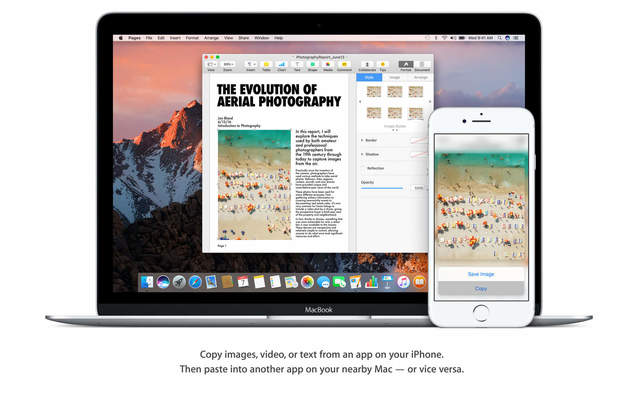
To use Universal Clipboard, your Mac must be running on MacOS High Sierra or higher and the lowest iOS version requirement is iOS 10.
Set up Universal Clipboard
To use Universal Clipboard, you need to set up some things on both your iPhone and Mac:
- Connect both your device to the same Wi-Fi network
- Enable Bluetooth on both devices.
- Log in the same iCloud account on your iPhone and Mac for the transfer
- On your Mac, head to System Preference > General and tick on Allow Handoff between this Mac and your iCloud devices
- On your iPhone, head to Settings > General > Handoff and toggle it on.
After setting up everything, you can now copy any content between your iPhone to Mac.
Method 3: Use AirDrop For Backing Up
Another built-in feature on both iPhone/iPad and Mac devices that you can take advantage of data backup is AirDrop. With AirDrop, you can easily transfer your data from iPhone to Mac just in a second. To do so:
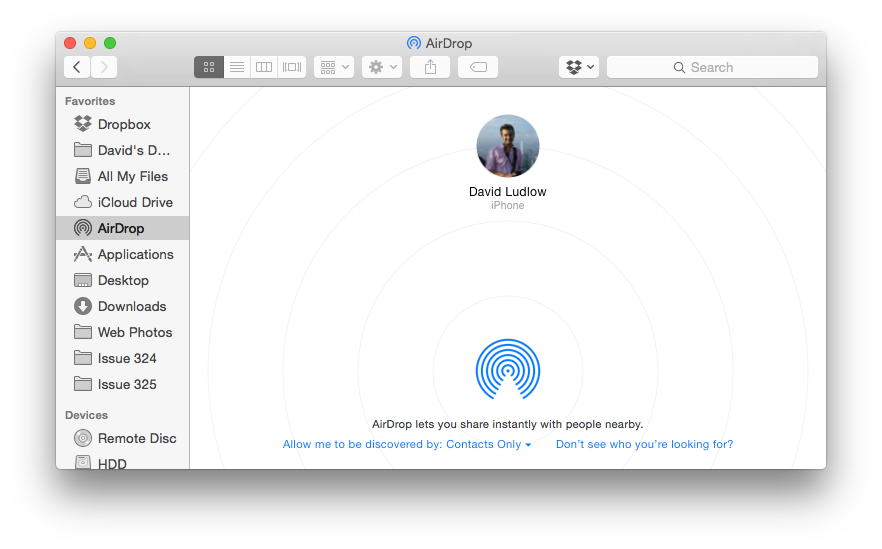
- Enable Bluetooth on your iPhone and Mac
- Swipe up from the bottom or swipe down from the top right of your iPhone to open up Control Center. Tap on AirDrop icon
- On your Mac, search for AirDrop in Spotlight and enable it
That’s done! You can now backup your iPhone to your Mac wirelessly.
Method 4: Backup iPhone via iOS Data Transfer Tool
Step 1: Install and open Data Tranfer
iOS Data Transfer allows you to backup and restore to with all the important data stored on your iPhone. The software will create a folder on your PC including videos, images, contacts (in the vcf format), apps, and even call history on your phone without any quality loss.
Step 2: Plug your iPhone to your Mac.
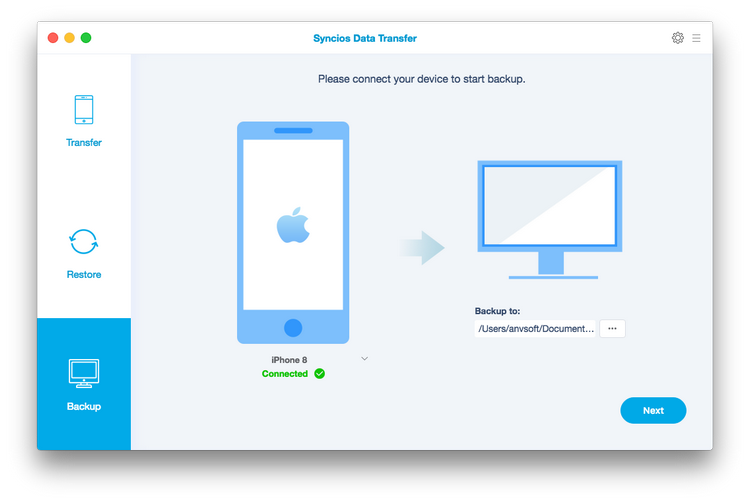
Connect your iPhone to Mac. Wait for a few seconds so the tool could recognize your iPhone. After that, click on Backup your Phone option to open up the Backup Panel
Step 3: Select data to backup to Mac.
After checking all data that you want to backup, simply click Start Copy, and the software will start to back up the selected files to your Mac.